Friday, September 27, 2013

I'd rather be at Texas Antiques week.


We've made it to another Friday! I've got a pretty slow day at work today so I'm kicking myself for not taking the day off to go junkin' all day in Warrenton! If you've never been to Texas Antiques Week... you are missing OUT. Twice a year, the road between Warrenton and Round Top, TX are filled with vendors from all over the country selling anything from antique dishes, furniture, handmade items, clothes, jewelry (!), to salvaged materials. You could go all day everyday the whole time they're open and you'd still never see everything there. 


This year's market kicked off yesterday. And I wasn't there. Annnd I'm not there today. But patience is a virtue right?? Hopefully I'll make it out there next Thursday and Friday in time for all of the dealers' "I-have-to-load-all-this-junk-back-up-so-I'm-gonna-lower-the-price-because-I-don't-wanna-fool-with-it" sales. 

Today is also the grand opening of one of my favorite vendors' official storefront. The Junk Gypsies, as seen on HGTV (and at Texas Antiques Week since I was in middle school), have opened their "Junk Gypsy National Headquarters" in Round Top Texas. The mother daughter trio have had a warehouse in College Station (Whoop!) for years and they sell lots of great stuff on their website, but they've never actually had a storefront. Round Top only has a population of 77, but with the floods of people coming in twice a year to pick through miles and miles of antiques and junk I'll think they'll do juuuuust fine. 

Here are some pictures they posted of their new home:
Photo source: http://junkgypsyblog.com/

Photo source: http://junkgypsyblog.com/

Photo source: http://junkgypsyblog.com/
They also planned Sadie Robertson's Sweet 16 party for the entire Duck Dynasty crew. It's ok that they're just off living my dream life.... I'm not bitter. Ha!

Every second Thursday of Antiques Week, the Junk Gypsies throw what they call the Junk Gypsy Prom. Ladies and gents of all ages come to town that evening in full, vintage prom garb, decked out in gaudy vintage costume jewelry and vintage butterfly boots ready to dance and drink with the best of 'em. The gypsies keep their booth open to sell their original wares, they have live music (Miranda Lambert and Kacey Musgraves are among the list of past headliners...), and Zapp Hall directly behind them serves margaritas. Sold yet? It is certainly a sight to see. If I can convince my little sister to play hookie next week, you better believe our petty coats are coming out of the closet! We haven't been since high school, so I'm itching to go back!

I mean come on, how fun does that look??

Photo Source: http://gypsyville.com/prom

The Junk Gypsies.
Photo Source: http://gypsyville.com/prom

Amie Sikes and Miranda Lambert.
Photo Source: http://gypsyville.com/prom
Check out the Airstream the gypsies funkied up for Miranda here:
http://junkgypsyblog.com/chapter-7-home-on-the-range-the-big-reveal-moonlight-marshmallow-roast-cowgirl-campfire-singin/

They're also hosting a book signing with another one of my favorite, famous junkers next Thursday. Rachel Ashwell, creator and inventor of "Shabby Chic", will be swinging by their new HQ to sign autographs. I only have 12 books and 8 DVD's she can sign... how ever will I choose?

Rachel Ashwell has also decided to make Round Top her home (one of them). The England native and California resident opened the most incredible B&B in Round Top called The Prairie. I'm telling you... this place looks like Heaven. Check out her website here: http://www.theprairiebyrachelashwell.com/index.html. These ladies really know how to live.


Photo Source: http://www.theprairiebyrachelashwell.com/

Photo Source: http://www.theprairiebyrachelashwell.com/

Photo Source: http://www.theprairiebyrachelashwell.com/

Photo Source: http://www.theprairiebyrachelashwell.com/

Photo Source: http://www.theprairiebyrachelashwell.com/

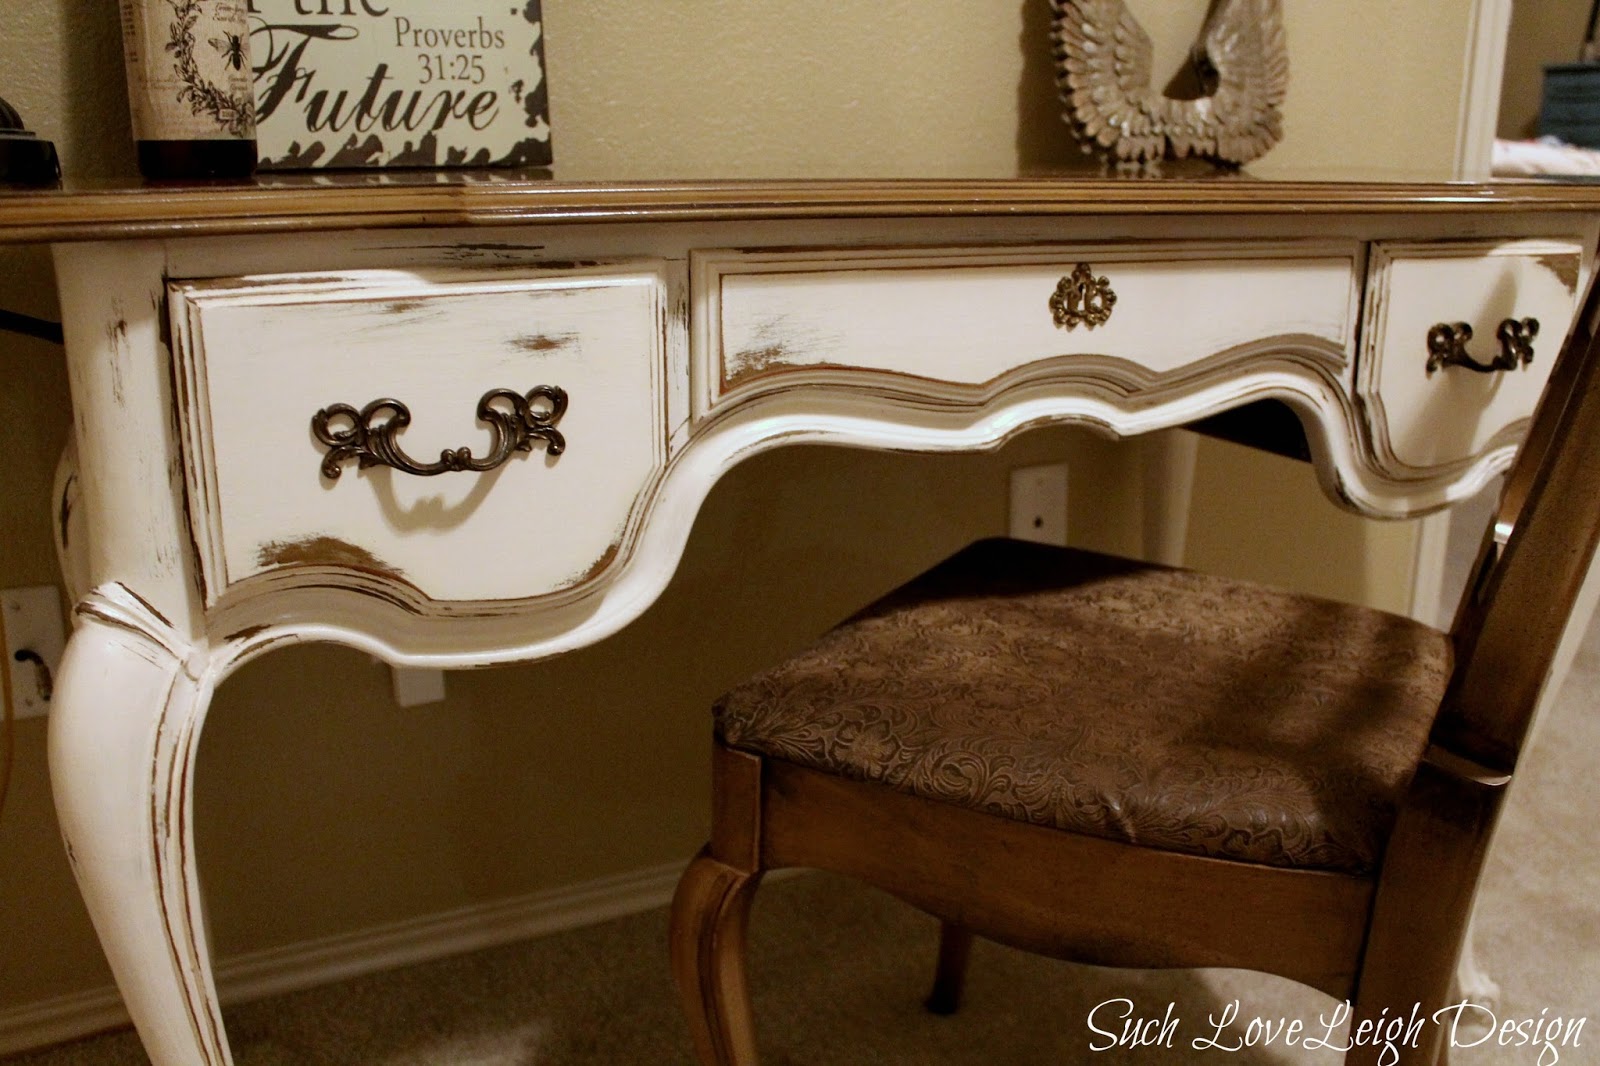
Maybe someday I'll be able to do something neat like these amazing, entrepreneurial ladies. But for right now, I'm gonna sit here and get my work done, finish up grad school and paint all the furniture I can in. 

Hope everyone has a FANTASTIC weekend! God bless each and every one of you!


Thursday, September 26, 2013

I tried to be colorful, I promise....


Ok, so I tried really hard to branch out and incorporate colors other than white, beige and taupe into my room decor. I just couldn't do it. I missed my ruffles and burlap! Robynne (my colorful little roomie sister) is so disappointed in me. 

I bought this floral scarf duvet from Urban Outfitters....
(All of those shutters cost a total of $6.00. Can you say steal??)

Buuuuut it's since been replaced with a white ruffly quilt.

I also painted my tallboy dresser and my lingerie chest a French Country(ish) blue using Jennifer Rizzo's chest pictured below as inspiration. 

Hers: 

Mine: 


But, I just couldn't do it. These two blue pieces have officially been sold and my bedroom walls are just aching for some more neutral pieces to match the two-toned Annie Sloan furniture that's already in the room!

(Sorry for the clutter- I had just moved in!)
Maybe I really am boring, or maybe I'm just always looking for an excuse to find another painting project. Either way, the color was fun while it lasted! 

Have a blessed rest of the week!

Ravanne Leigh


Tuesday, September 24, 2013

"Dirty Cowboy" treatment- distressing with stain

Happy "at least it's not Monday" day everyone! Today's tutorial is a modified version of the "Dirty Cowboy" treatment featured here: http://www.domesticimperfection.com/2012/05/the-dirty-cowboy-treatment/. In her tutorial, she started with a painted piece of furniture, and she didn't distress. So I used bits and pieces of her process, and mixed in my on chaotic methods. 

What you'll need: 
1. A piece of furniture :)
2. Minwax stain of your choice (I used "Dark Walnut")
3. Shop towels you don't mind ruining and/or paper towels
4. Paint color of your choice (I used Behr "Jungle Trail")
5. Medium grit sandpaper (I used an 80 grit sanding sponge)
6. PolyAcrylic finish (optional)

Going into this project I knew that I wanted the end result to be distressed, but I also knew that I didn't want that raw blonde color showing through. So I started by...

Step 1: If you're starting off with a stripped, sanded, or raw piece of furniture and want your sections that "peep" through the distressing to be a different color, the easiest way to achieve that is to stain your piece first. I layered on 2 coats of Minwax "Dark Walnut" stain with my shop towels and let that sit until completely cured. 


Step 2: After my stain was completely dry, I painted a coat of Behr "Jungle Trail" directly over the stain. I know it seems counter-intuitive, but layering stains and paint is a great way to show several colors after distressing. 


Step 3: Now for the fun part! Take your sandpaper (or sanding sponge) and start with the edges, and gradually work your way in. Make sure not to sand too firmly as you risk taking off the paint and the stain which could expose the original layers of the wood. 

Step 4: After I sanded the piece to my liking, I wanted to "dirty up" the final finish. So, I used a towel to apply one final layer of stain, concentrating on the distressed areas. 

Step 5: If you want to seal your work, apply a layer of Eggshell Polyacrylic. I left my paint exposed, which will allow for more chipping and natural distressing. 

After my last layer of stain and some new knobs, the final piece turned out like this: 


This process is one of my favorites, because you don't have to be perfect... at all. It's just a matter of trial and error. If you don't like a spot or section, all it takes is another layer.

Have a great week everyone!


Wednesday, September 18, 2013

Martha Stewart Glaze... and Craigslist bartering?

Happy Wednesday Y'all! I'd say "Happy Hump Day" since that darn camel is so popular these days, but to tell you the truth that phrase just kinda sorta grosses me out. Annnywho, this weekend I had every intention of getting to work on this great, curvy, French Provincial, tallboy dresser I got (read: stole) from my mom a couple of weeks ago buuuut then the weekend turned into backyard grilling, late morning pancakes, drives out to The Oasis and LOTS of football. Tallboy loses.

However, I did do something a little crazy on Saturday morning.... I bartered on Craigslist for the first time. Yes- bartered. A few weeks ago, I put this little turquoise end-table on Craigslist. I got lots of bites (I wasn't asking much), but the one that stood out to me most was a woman who offered to give me a free full color and cut for the table. SOLD. This ginger can't afford to be a blonde these days, so the rebel in me agreed. Let me tell you this- I'm hooked! We decided that I'd send her pictures of my finds periodically in exchange for free hair. She admitted that she barters for just about everything- furniture, babysitters, etc.  I've never felt more cheap- but I'm ok with that.

Here's the piece I traded for a new do: 


This cute little guy had been sitting in my grandma's shed in San Antonio for a few months and she practically begged me to take it. It looked like the perfect size for a "practice piece", so I loaded it up (with some other junk she gave me to fix up) and headed back to Austin. I had never used Martha Stewart glaze before (only Valspar tintable glaze, which I love) so I thought I'd try it out. 

This is the shade I used. It has a subtle glitter in it... Need I say more?

The piece was in pretty bad condition- I had to use a lot of wood filler to conceal dents and scratches. But after I got everything filled in and sanded down, I was able to follow this handy little tutorial pretty much step-by-step. I used the same Behr "Mermaid's Dream" color (you have to ask for it because there isn't a swatch for it anymore), swapped out the Valspar glaze for some Martha and distressed mine more heavily, but Ana White does a great job of walking you through the process!


A few things I learned with this glaze:

1. When she says let it sit.... actually let it sit :) I'm impatient, and 
therefore I ended up completely wiping it off a few times. 

2. Dry cloths and wet cloths make two very different effects- dry cloths do 
a better job of spreading the tint over the whole piece, while wet
 cloths tend to leave more color on the distressed/sanded areas 
and less on the flat painted areas. 

3. Use more glaze on those distressed areas- more color
will soak into the raw wood and you will get a better aged look. 

4. Don't get a manicure right before you use it- you'll just waste your money. 


Well, overall I really enjoyed my bartering experience. If you have a talent or hobby you think people 
would potentially want to barter for, I'd say give it a shot! Just make sure to be smart about it. I am entirely too trusting of people, but I made sure that we met in a public location and I brought a dude along with me (bodyguard much?). We've all heard of people who have ended up in unfortunate situations while buying/selling on Craigslist- so please be sure to follow these safety tips when dealing with any kind of online selling. 

I hope everyone has a great day, and rest of the week! Happy DIYing and God Bless!

-Ravanne

Friday, September 13, 2013

DIY Craft Crate Bar Cart

First of all, HAPPY FRIDAY! I'm really looking forward to a weekend with no travel plans (rare for me) so I can finally paint a couple of pieces that have been crowding my garage. I think Robynne might put them all in a burn pile here pretty soon if I don't get them out of the way...

Anywho, I was going through some pictures of old projects and thought I'd do a mini tutorial on this easy little bar cart I made out of plain craft crates from Michael's. These pictures are old (and poor quality), and don't show each step in depth, but I"ll try to explain the best that I can!

What You'll Need: 
- plain craft crates from Michael's
-stain color of your choice (I used MinWax in Dark Walnut)
- wood glue
- stain brushes
-dropcloth... unless you have surface you don't mind staining
- drill and 10 3/4" screws
-PolyAcrylic finish (optional)

1. I started off with the 6 plain craft crates from Michael's, but you can choose however many you want depending on what size you'd like your final project to be! However- here's a little tip: you'd think these crates are cheap right? Yeahhhh, no. They rang up at $13.00 bucks a pop. So, being the cheapo I am, I printed out 6 separate 40% off coupons from the Michael's website and had the cashier run 6 separate transactions. He and the woman behind me were definitely not my biggest fans...

They looked like this:
Shiner thinks she's a model....
(Please note my tiny little balcony in my old apartment complex. I was constantly getting nasty-grams from the staff complaining about the half-painted furniture on my porch. What did I even do before I had a garage and a backyard?!)

2. Next, I used my wood glue (Gorilla Glue brand... that stuff sticks!) to adhere pairs of two crates together. I ended up with 3 sets of 2, glued to each other on their short sides. Then, I repeated that process and glued the pairs to each other on their long top sides. Although it sounds more logical to stain each crate first, the glue sticks to raw wood much better! Plus, why paint sides that you're just going to hide? 

I tried to take a picture of the stack... but it didn't really work out. Can you see past my pup? :)
3. After I got them all glued down in the right spot (play with the configuration a little before you glue them... the crates aren't exactly uniform so you might need to switch a couple around to make sure they look straight). Then I clamped every seam and let them sit for about an hour and a half. 

4. Next, I secured the boxes on the inside of the middle "seam". I inserted 3/4" screws in the very back corner of each crate to attach them to both the crate beside it, as well as above/below it. The wood was soft enough to screw directly into- so you shouldn't have to pre-drill any holes! I used 10 screws total. 


5. Now that your structure is secure, you can stain it! I used MinWax Dark Walnut, and did about 3 coats. If you're new to staining, check out this simple tutorial from the DIY Mamas. Just be prepared from nasty looking cuticles if you don't opt for some gloves! Remember to let the stain cure completely or dirt and dust and other funkiness will stick to it. I liked the natural texture of the wood, so I didn't seal my crates with anything. But if you like a more glossy, finished look you can always add a coat or two of PolyAcrylic.

When I was finished, my little bar cart looked like this! It was the perfect way to add some storage space in my little apartment's kitchen area. I was one happy wino :)


Of course, you could use this for any number of things. I've seen them used as cubbie units in kids' rooms, rustic outdoor storage spaces, entertainment centers with lots of room for books and movies, etc. 

Happy DIY'ing everyone! Have a safe and blessed weekend!


Wednesday, September 11, 2013

Design Shock- Decorating a House with my Wild Child of a Little Sister

Ok I PROMISE I'm not going to be posting daily to this little baby- but it's new and exciting so I'm gonna go ahead and post again :)

For those of you that know me and my little sister, you know that we are polar opposites. I'm tall, pale and blonde (okay, ginger...) and she's a tan little shrimp with dark hair. I'm kind of safe in terms of fashion and jewelry, and that kid is the trendiest person I know. I listen to mainly country and surf-rock music, and that girl can rap every word to songs I've never even heard. Well, the story is no different when it comes to our taste in decor.

 I lived in an apartment by myself for a year after graduating from college. My taste is pretty simple- I love shabby chic, French country and rustic motifs. I find inspiration in thrifty re-purposed items, vintage pieces and feminine accents. Here are some pictures of my first apartment (neutrals galore, I know...).

Sorry about the blurry iPhone pictures... I didn't see blogging in my future when I took them!

Favorite elements in my old place: My Hotel Paris sign my mom found at Warrenton Antiques Week (heaven on earth, btw), my cowhide rug I've had since middle school, and my chunky coffee table that was ugly as sin before I tackled it with some Annie Sloan Old White Chalk Paint.
If you can't tell, I love ruffles. And neutrals. And document/script print. 
This was my guest room. And that's my crazy little shelter dog, Shiner. :)

A year later, Robynne and I moved into a house (3 dogs in an apartment = not happening). I knew that I'd have to funky up my style just a little bit when we moved in together, so we started a Pinterest board together to find a happy medium between my neutral/shabby taste and her trendy/colorful ideas. I think we've found a really good balance so far! What do you think?

I get my rustic table, she gets her pops of color! It's a win win here. 

Robynne LOVES metallics. We bought this shelving at IKEA and took to it with some gold spray paint! 

This table was shabby and GROSS. After some serious cleaning and sanding, we painted it mint and used Martha Stewart Metallic Paint on the legs to create the "dipped" effect!

This ombre dresser is one of my favorite pieces we've done together so far. We actually painted it to sell, but liked it so much we stuck it in our living room! Also, check out other cute prints like our "Hey Y'all!" by Stephanie Creekmur- she has TONS of great stuff!

We've only been here 2 months and we still have a long way to go in our little rent house, but it's certainly coming along and I'm having a blast trying out all of these new trends with Robynne girl!


Tuesday, September 10, 2013

A blogging rookie's first post- French desk redo!

Welp- here goes nothing. I've never made a blog post before, so don't judge too harshly! I mainly wanted to start this little thing to give myself a more professional outlet to post my furniture pieces than my personal Facebook and Instagram. Plus, I think my friends were starting to get annoyed with these kinds of posts.

So, my first "official" Such LoveLeigh Design piece to post is this two-toned French Provincial drop-leaf desk and chair. I got this beauty from a creepy old man on Craigslist (aren't they all?) and I practically had to pry it out of his fingers. PS- he was nearly 70 and wearing the shortest Jorts I've ever seen.... but anyway...

It started out looking like this....(already gorgeous)

... and this is what it looks like after I gave it a shabby little face-lift.


I've been on an antique-white-and-natural-stain kick for awhile now, but I just love that combination! I'll venture out more here soon... maybe.

This is currently on Craigslist in the Austin area listed here: http://austin.craigslist.org/atq/4075971957.html

After I figure out how in the WORLD to ship furniture on Etsy, my shop will be up and running.. don't hold your breath :)

God Bless!